
Decker panel - Leak detection
As told in the article "Rusted floor", I still had a significant water leak inside the car, at the front passenger's feet (remember it's a left handed drive). According to the tests I had done, water came in from the front. So the first thing to do was to have a look under the bonnet.
I was not disappointed :
Nice, rusty holes above the windshield washer tank, as well as, but smaller, on the driver's side.
Holes fixed as previously with fiberglass and resin.
No picture yet :-(
But after a rainfall, I still had water inside the cabin. Where did it come from ?
I decided to dismantle the decker panel to see what is hidden below;
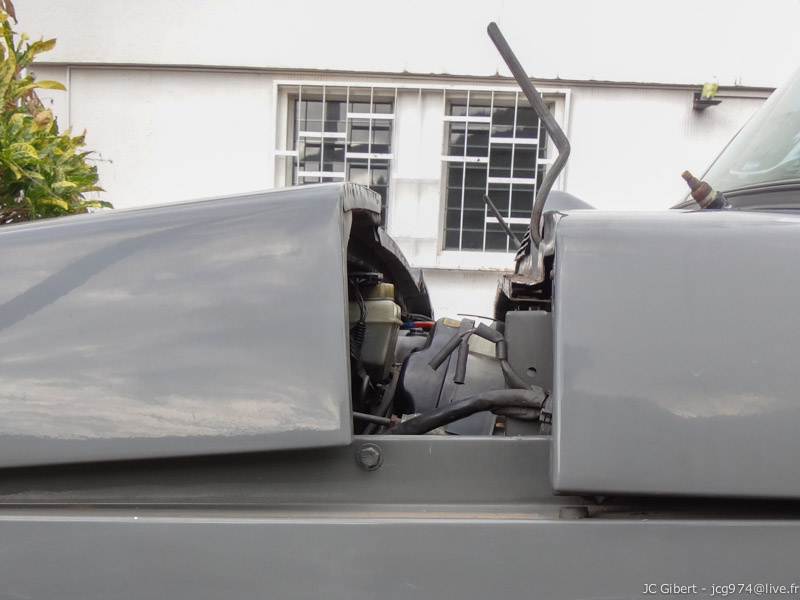
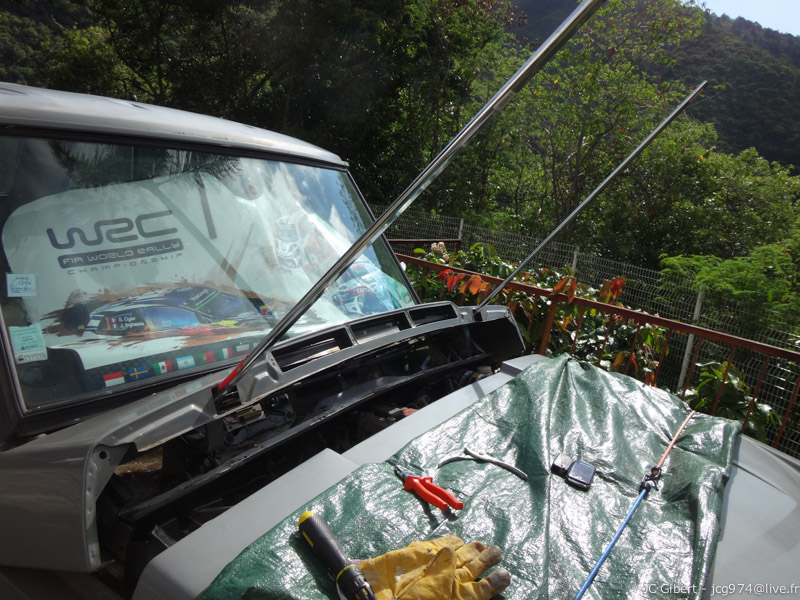
But to do this I first had to remove the bonnet itself.
It's quite heavy and is secured by two hinges.
There is two bolts by hinge, easy to remove, but take care of the "U" washers that can be located in between.
Remember how many are they and on which bolt !

Once the bolts removed, just move the bonnet forward...
Actually that's what I did, but DON'T DO IT !!!
If you do so, you will see the hinges leap like devils of a box. Very surprising.
Well, if you don't wont to be as stupid as I was, you have to pull it up after removing electrical wires and water tubes.
And as it's quite heavy, you obviously have to be two people (at least) to do that or use ropes if you can attach them to the ceiling.
My excuse is that I was a alone and outside. And silly.
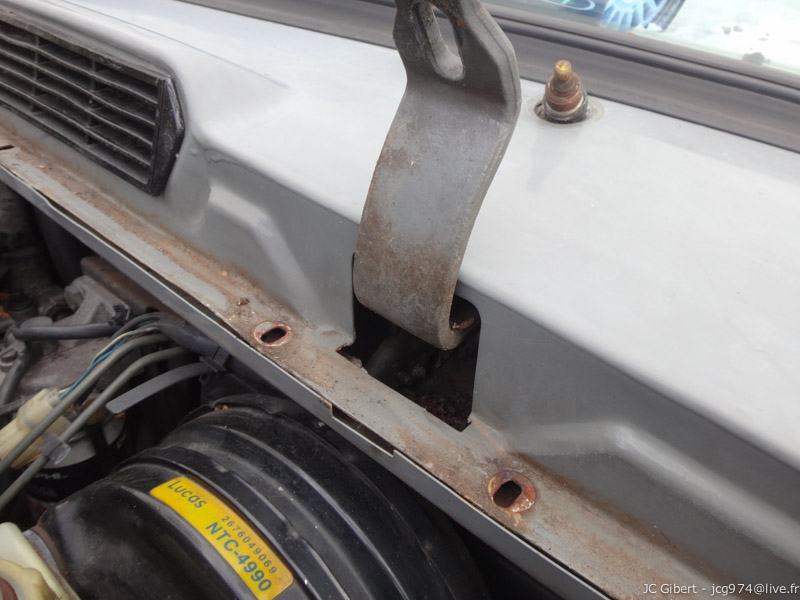
Anyway, I could now remove screws and bolts fixing the decker panel.
Phillips screws along the hood, two bolts (10mm) on each side, not so easy to access...
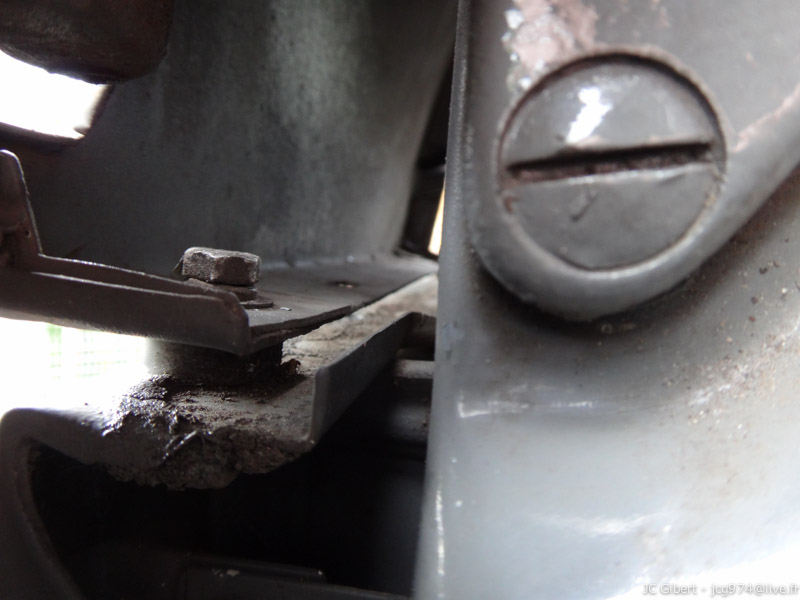
and one Phillips screw again inside near the door.
However, even if any mechanical attachment is now removed, removing the panel itself is still impossible because of the two hinges in high position and well maintained by powerful springs.
It had now to put them in horizontal position the time to remove the panel.
To do this, no other way but using leverages.
The more convenient tool I found was garment rails, oval cross-section (about 25x37mm), easy to find and very cheap.
I had only one at the beginning (in the background on the picture) but I bought a second one as it was so convenient.
I asked for some help for the following step :
While one people operates the levers by pulling them down, the other can easily remove the panel by slipping if forward.
As we were only two of us, unfortunately there was nobody else to take a picture !
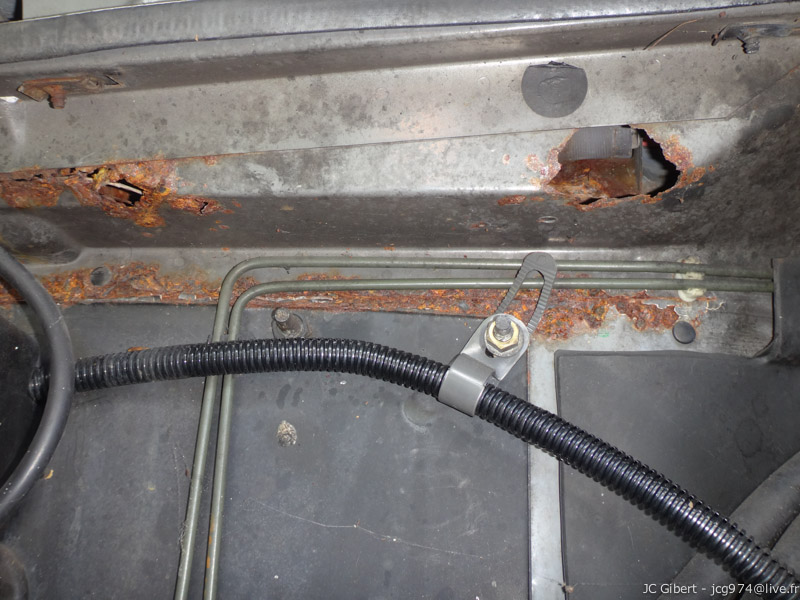
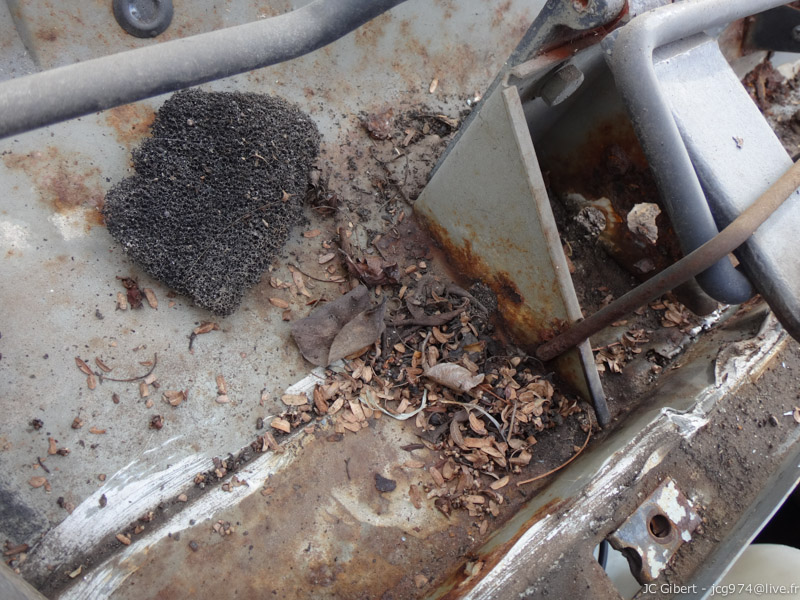
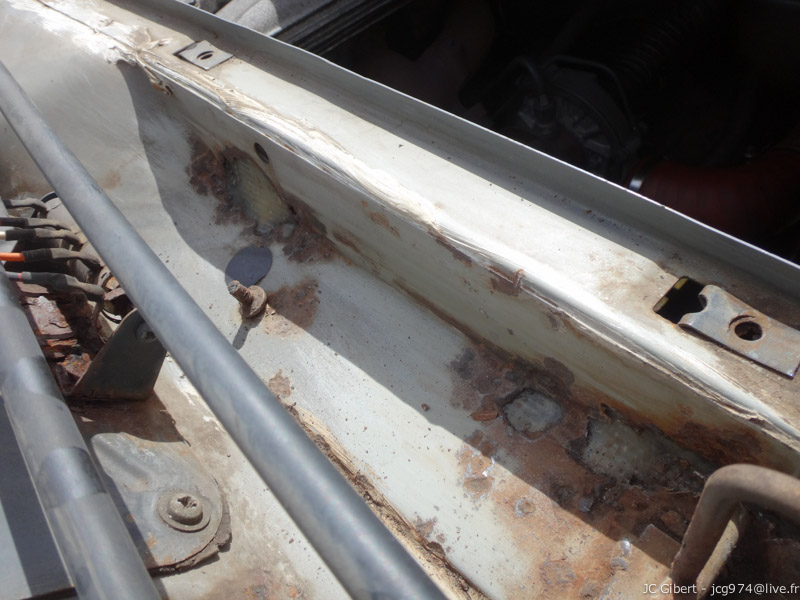
Once removed the decker panel, you can see the needle springs, the wiper linkages as well as some rust and... plant debris (left side below)

Right side, more rustn more plant debris, and remaining of filtration foams (I wondered where they disappeared) :
I could also see (below, after cleaning) the other side of the repairs made under the bonnet :
So I was now be able to finish the repair by doing the same thing on the upper side (stripping, anti-rust, fiberglass and resin).
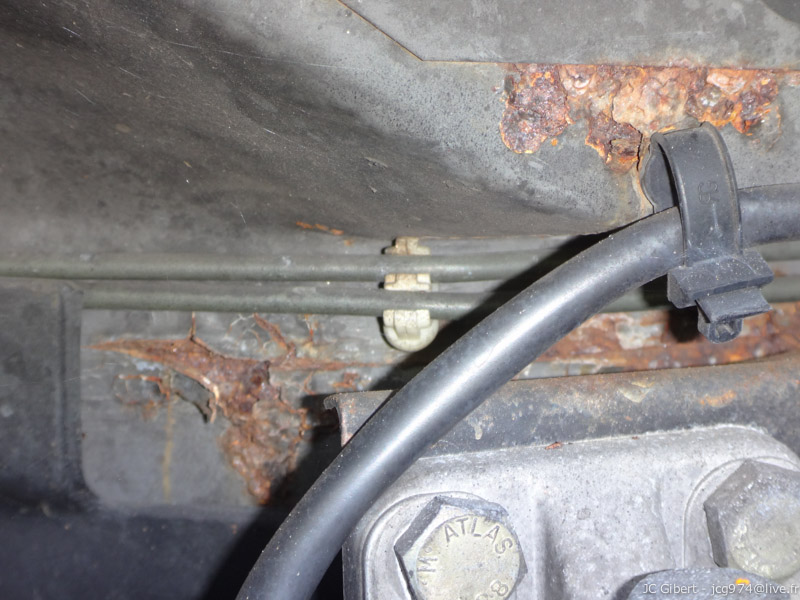
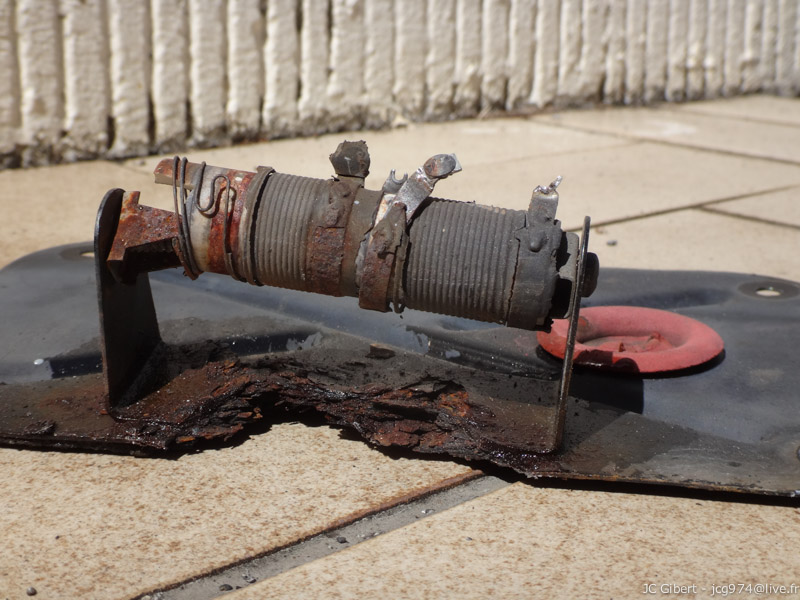
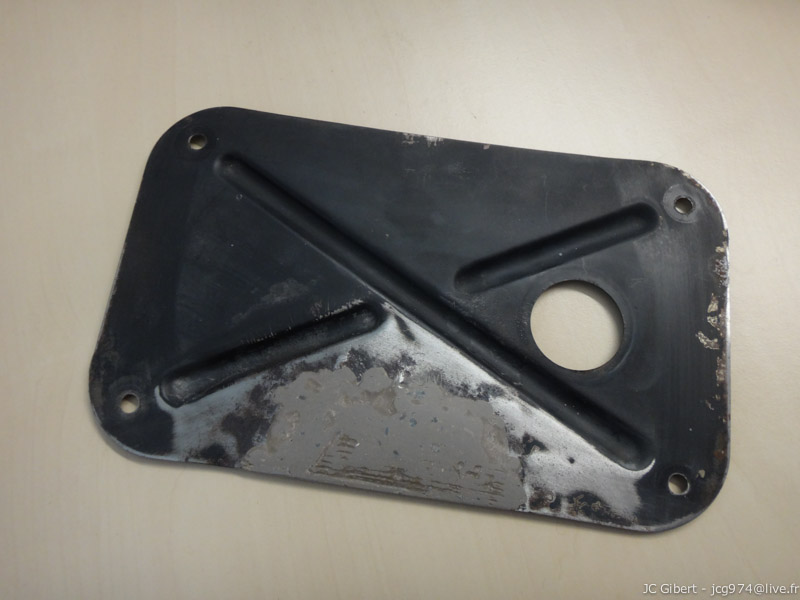
But the most interesting thing was this :
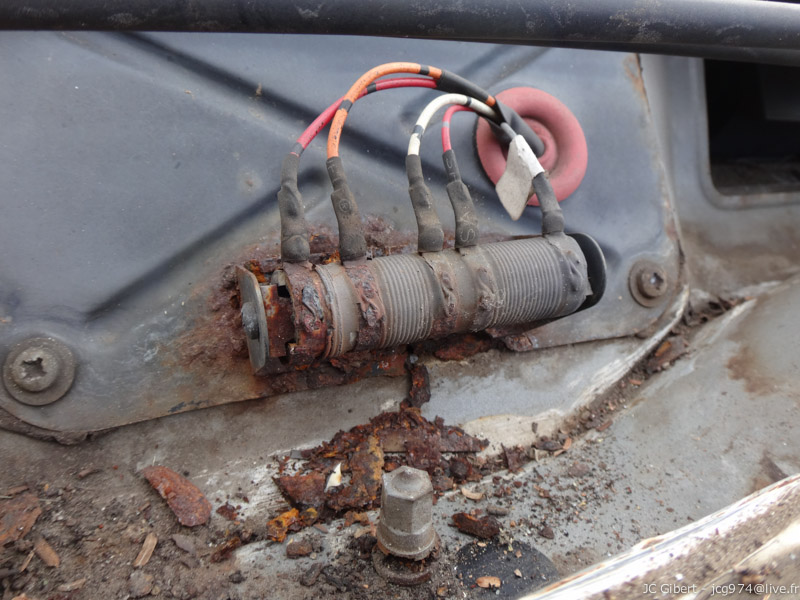
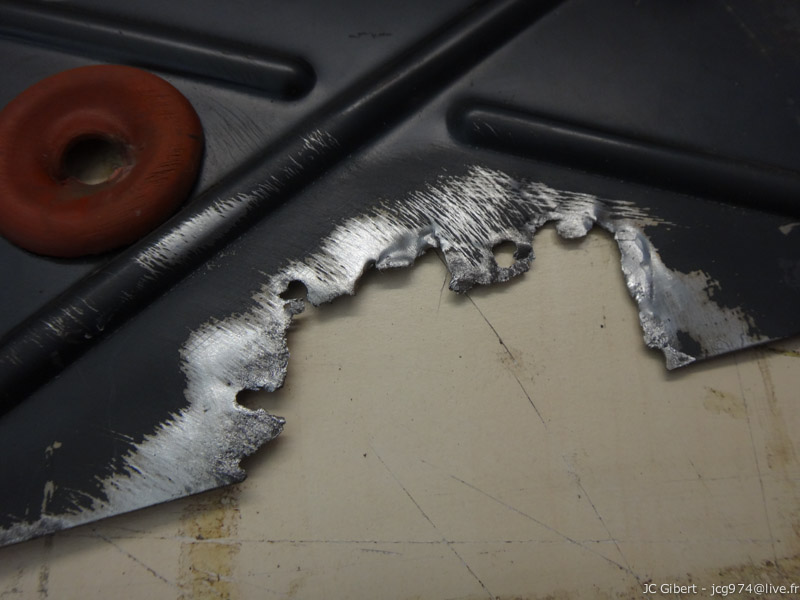
Totally corroded as well as the mounting plate, making a large hole (under the resistors), I now understood where the leak came from.
First thing, fix the hole on the mounting plate :
Repaired (actually rebuilt) with epoxy resin
and then, of course, mount new resistors (bought at Famous Four, référence FF009093 - Resistor for Heater Motor Fan, 38.50 £) :
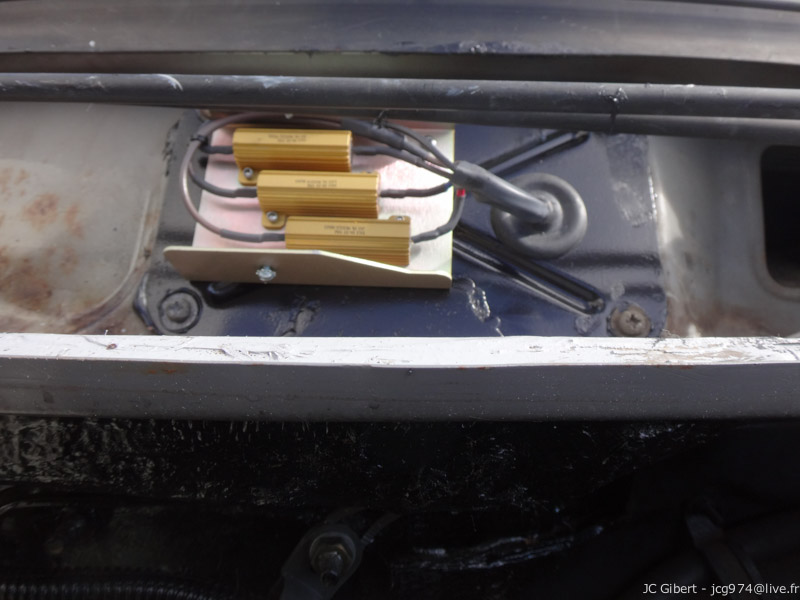
Be sure to use sealant filler before replacing the mounting plate.
Then I had to do more or less the same steps in reverse order to put the decker panel back..
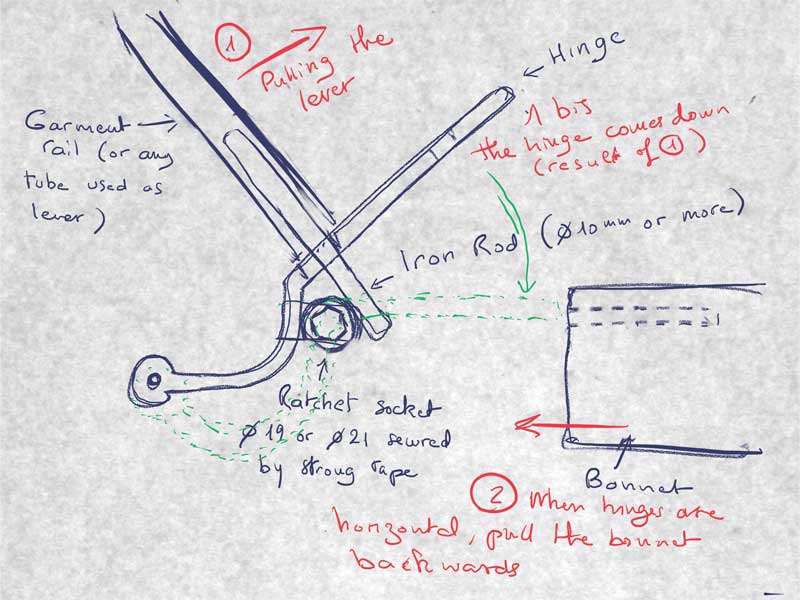
The last thing left to do was to put back the bonnet.
In my opinion, the right way to do this is to put it back from above.
But of course I choose the other solution, that is lowering the hinges and sliding the bonnet backwards.
Obviously you can't use the garment rails the same way as before, because this time, the end of the hinges must be free.
So to put the hinges back, the leverage must be different, with 90° rotation. so I used the hole in the hinge to introduce a strong iron rod, avoiding slipping by setting à ratchet socket (19 or 21), secure by strong tape, and finally put the garment rails on the iron rods.
I'm not sure it's clear, probably too difficult to me to explain in english, so I put a drawing that I hope you will be able to understand
Of course you will need help to do that (2 at least, I mean 3 people in the total), and think to protect the other parts of the body with blankets to avoid paint scratches.
And after doing all this, there was not leaking and no water inside anymore...